
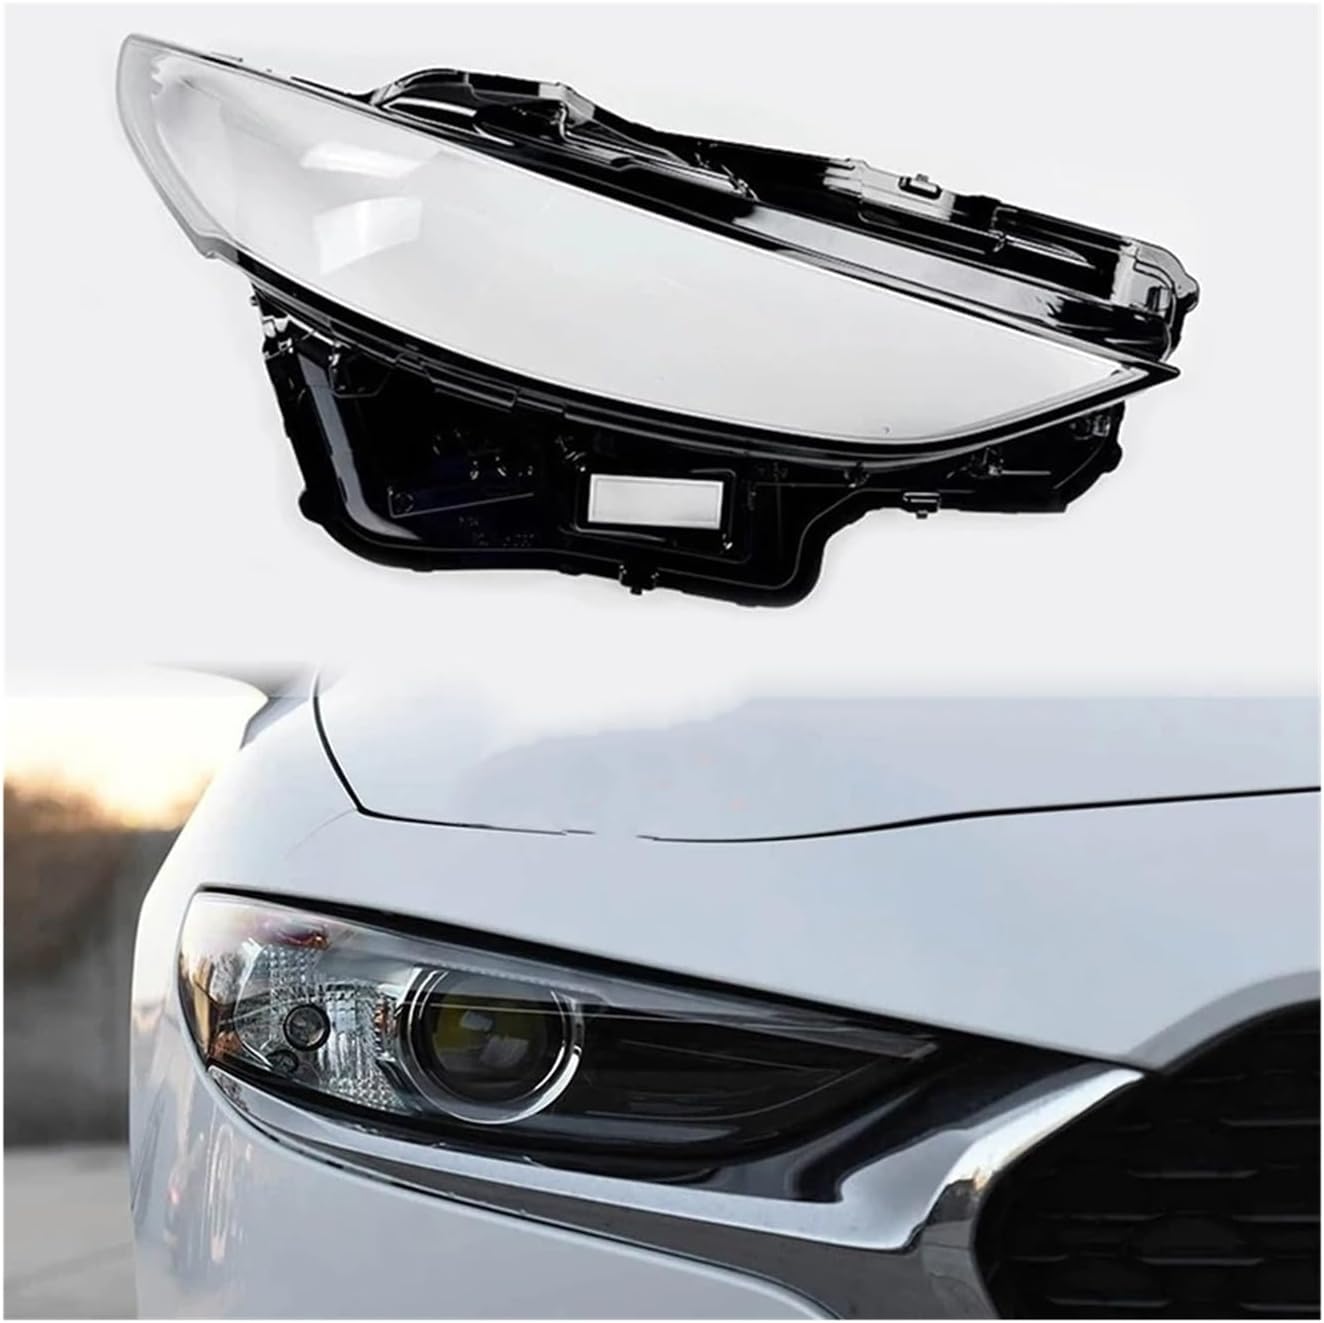
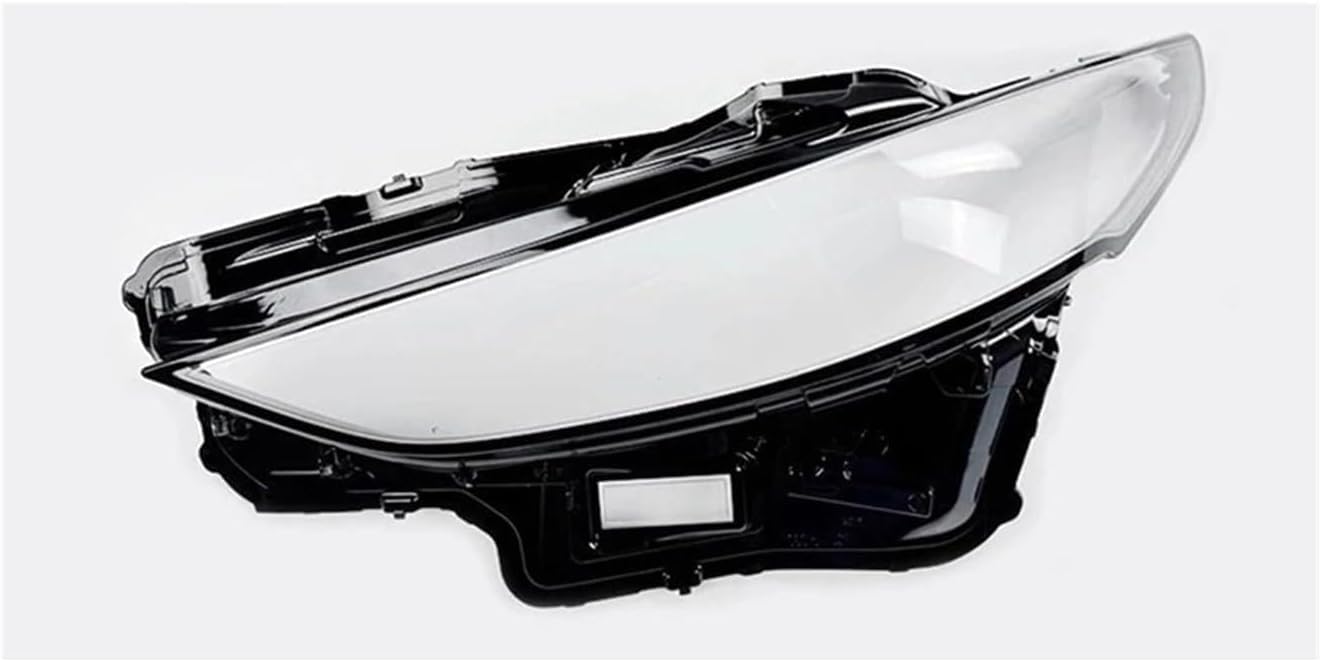
Compatible For Mazda 3 Axela 2019-2021 Car Headlight Cover Cap Dust Cover For Headlights Car Accessories Automobil Parts Accessori(1 Piece Right)
Product details
| Management number | 219326775 | Release Date | 2026/05/03 | List Price | $63.00 | Model Number | 219326775 | ||
|---|---|---|---|---|---|---|---|---|---|
| Category | |||||||||
Pair Front L+R Headlights Lenses Lamps Covers Compatible For Mazda 3 Axela 2019 2020 2021Specification:-Type: Headlight Headlamp Lens Cover-Material: Polycarbonate Plastic-Color: Clear-Fitment Type: Direct Replacement-Placement on Vehicle: Front, Left, Right-Not included instructionFeatures:1.New headlight lens covers.2.Made of high quality polycarbonate with a protective UV coating which prevents yellowing or fading.3.Made of high quality plastic material, light weight and durable.4.Transparent shell, does not affect the light emission.5.Protect your headlight of your car from breaking, dustproof and waterproof.6.Perfect for a clean, revitalized look.7.Replacement requires special glue (not included)Fitment:Compatible For Mazda 3 Axela 2019 2020 2021(Pls confirm the product if it matches your car before you purchase.)Package Included:Headlight lens cover (left,right or pair), according to your choiceNote:1.Please make sure this item will fit your vehicle before you purchase.2.Due to age, some vehicles will require new weatherstripping behind these lens.3.Due to the different display and different light, the picture may not reflect the actual color of the item. Thanks for your understanding.4.(IMPORTANT) No Instructions Included. Professional Installation Is Recommended!Lampshade Disassembly/Assembly Guide1. Remove the entire headlight (some models require removal of the grille and bumper). If the headlight cannot be removed, it is not recommended to do it yourself2. Check the area around the headlights to see if there are screws fixed. If there are, remove the screws first3. Prepare a hot air gun (high-power hair dryer is also acceptable), a flat screwdriver, and aim the gun at the pointed corner of the headlight to blow4. Pay attention to the distance between the air vents, control the time, and avoid blowing the lamp body. After 3-5 minutes of slight heat, quickly remove it with force5. Use a flat screwdriver to press against it, pry open a hole, and continue to blow soft sealant along the edge with a hot air gun6. Blow and peel open at the same time, and it will all peel open in a short while. (The lampshade and interior decorative frame are connected together)7. Use a screwdriver to clean the old glue, and clean it thoroughly. Remove the snake glue and tear off the oil paper8. Remove the decorative silver frame from the old lampshade (don't forget) and install it onto the new lampshade9. The hot air gun evenly blows heat to soften the new snake glue, blowing a few more times to slow down the blowing speed. Softening snake glue10. Observe the specific location of the glue on the old lampshade, and make a rough mark on the same position of the new lampshade11. Apply force evenly to close the old lampshade, making sure it is evenly pressed all around, all corners, and the depth of pressure should be even12.Press to the previously marked depth and observe if the depth of the lampshade is evenly pressed around it13. Use clamps to clamp the lampshade and lamp body, wait for cooling, and avoid bouncing open14. If the depth of the lampshade pressing is uneven, it is easy to cause gaps when installing the lamp in the later stage15. Wait for 2 hours, prepare for loading, adjust the gap evenly to the original vehicle level
- The surface is covered with imported UV hardening coating, which is resistant to UV aging and does not yellow or crack after long-term exposure to sunlight.
- Designed with a 2mm thick material, the impact resistance has been improved by 30%, resisting damage from external objects such as gravel and tree branches.
- The integrated design of waterproof sealing strip tightly adheres to the headlight base, effectively preventing rainwater and dust from infiltrating the interior of the lamp cavity.
- Nano level anti fog coating technology ensures clear night lighting without fogging in rainy/temperature difference environments.
- Compatible For Mazda 3 Axela 2019-2021 Car Headlight Cover Cap Dust Cover For Headlights Car Accessories Automobil Parts Accessori
| Color | 1 Piece Right |
|---|---|
| Brand Name | FQCYGXGXP |
| Manufacturer | kaikaifan mall |
| Model Number | kaikaifan mall |
| Automotive Fit Type | Universal Fit |
| Is Assembly Required | No |
| Manufacturer Part Number | XZPKZKDPP-1PIECERIGHT |


Bestseller ranking
East South Central


Customers who viewed this product also viewed
Diamond Discs


Correction of product information
If you notice any omissions or errors in the product information on this page, please use the correction request form below.
Correction Request Form